
1. Form Elements Presets allows you to customize the appearance of Form Elements in the Advanced Contact Form. The Advanced Contact form has four presets. Click Preset 1

General Settings
2. You can configure the following blocks for the Form Elements: Form Fields, Error Message, Sizes, Field Icon, Border, Colors
You can also configure the following tabs: Checkbox, Radio Buttons
Select Font and Font Style for the Form Fields

3. Select Font and Font Style for the Error Message. The error message can be seen on the live preview on the website if submission via the contact form fails
Additionally, specify the Font Color. If you need a specific color, use the Color Picker

4. You can configure the following for Form Fields: Font Size, Line Height, Height
Line Height - sets the distance for the Form Field placeholder text.
Height - sets the height of the form itself.

5. Specify Icon Size, Left Spacing, and Right Spacing for the Field Icon

6. Specify the Font Size for the Error Message and adjust the Line Height

7. If needed, set the Border for the form (Solid, Dashed, or Dotted) and specify the Width and Corners

Checkboxes
8. Specify Font, Font Style, and Label Color for the Checkbox. If you need a specific color, use the Color Picker

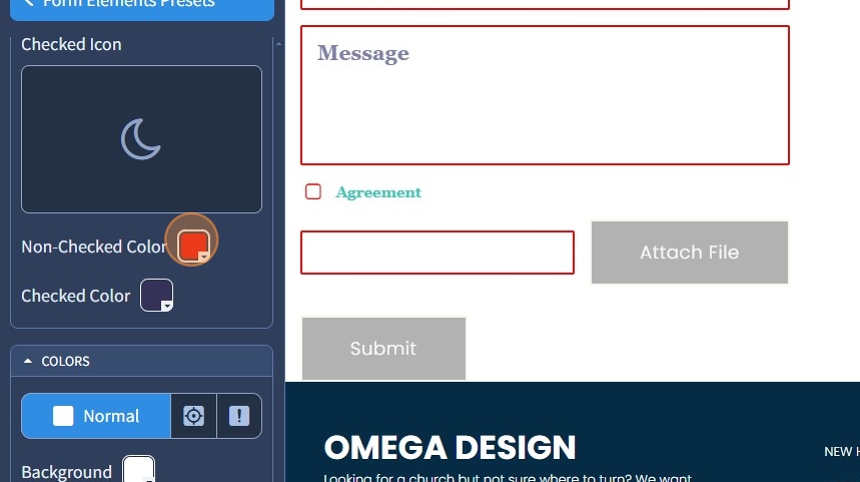
9. If needed, click the pencil icon to change the icon for Non-Checked and Checked states

10. Specify color for both Non-Checked and Checked states
Radio Buttons
11. Specify the Font, Font Style, and Label Color for the Radio Buttons.

12. If needed, click the pencil icon to change the icon for Non-Checked and Checked states

13. Specify the color for both Non-Checked and Checked states. If you need a specific color, use the Color Picker

14. Use the Normal, Focus, and Error State buttons to set the color for Normal, Focus (the state when the element is clicked), and Error states
You can adjust the following colors for all three states for the form: Background Color, Border Color, Font Color, Placeholder Color, Field Icon

15. Click the "Save" button to confirm the changes
