
1. The Mail tab allows you to add a sender email for the contact forms on the website and enable SMTP (Simple Mail Transfer Protocol) for sending emails through your website

2. Specify an email in the "Email from" field. It can be, for example, as follows: info@yourdomainname.com, webmaster@yourdomainname.com, contact@yourdomainname.com, noreply@yourdomainname.com
This e-mail address will be used as sender for all contact forms on the website. If the field is empty, e-mail address from user profile will be used as sender per default.

3. Our Contact Forms use two methods for sending emails - phpMail() and SMTP
Here's where you can enable SMTP. You can get the SMTP details from your email service provider.
As an example, the Gmail SMTP details look as follows:
- SMTP Server:
smtp.gmail.com - Port: 587 (TLS) or 465 (SSL)
- Authentication Type: Login
- Username: your Gmail address
- Password: your Gmail password (consider using an App Password if 2-Step Verification is enabled)

When to Use This Setting?
You should enable "Use SMTP Server" if you want to send emails via an external SMTP provider, such as Gmail SMTP or other third-party email services.
If you're using Google Workspace or Microsoft Outlook, you don’t need to configure SMTP settings in the website builder—just ensure that your MX records, SPF, DKIM, and DMARC are correctly set in your DNS settings for reliable email delivery or have us add them if we're your domain name registrar/your DNS resolves through us. If you need help with this, feel free to contact us
4. Specify the SMTP server in the corresponding field

5. Specify the SMTP port in the corresponding field

6. Select an authentication type for the SMTP server. The following options are available: None, Login, Plain, CRAM-MD5

7. Specify the SMTP username in the corresponding field

8. Specify the SMTP password in the corresponding field
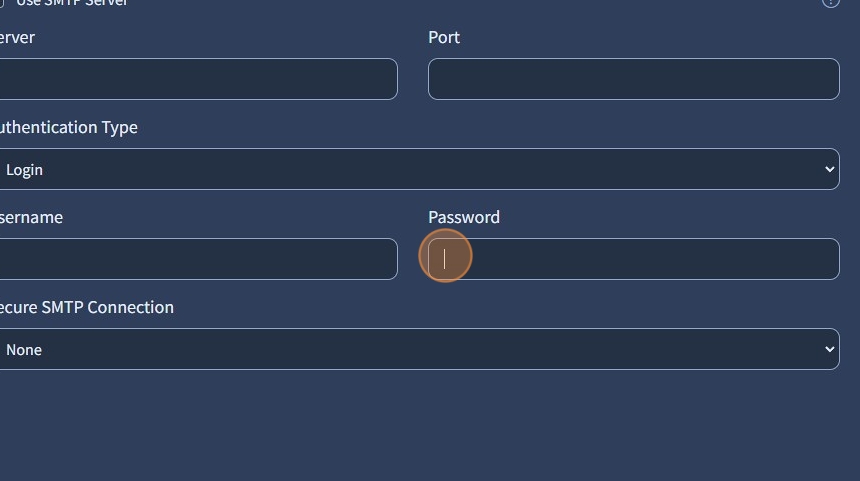
9. Select the secure SMTP connection type, TLS or SSL

10. Click "Save Changes" to confirm the changes
