
1. Navigate to the admin panel.
2. Drag and drop the "Advanced Slider" widget to the desired location.
This widget allows you to create sliding video galleries or fill Advanced Slider with slides that can contain the following content: Row, Text, Image, Button, Divider, Space, Contact Form, Social Links, Audio Player, MailChimp, Progress Bar, and Paypal Button.

3. Click the "Add" button to add a new slide.

4. You can edit your slide by clicking the "Edit" button.

5. To add a widget to a slide, you can drag and drop the required widget to the desired location. Also, you can add a widget to the slide by using "Simplified Editing". You can learn more about "Simplified Editing" in this guide.
You can also drag and drop the widget you want into a column from the list of widgets on the left.

6. Click "Apply" to save the slide.

7. Use the "Gear" button to change the background of the slide.

8. The Slide Settings pop-up allows you to change the background color and image or set video elements (.mp4 and .webm) to use the video gallery.
If both options are selected, .webm is preferred for compatible browsers.

9. Click "Apply" to save the background changes.

10. You can copy a slide by clicking on the "Copy" icon

11. Click on the bin icon to delete the slide.

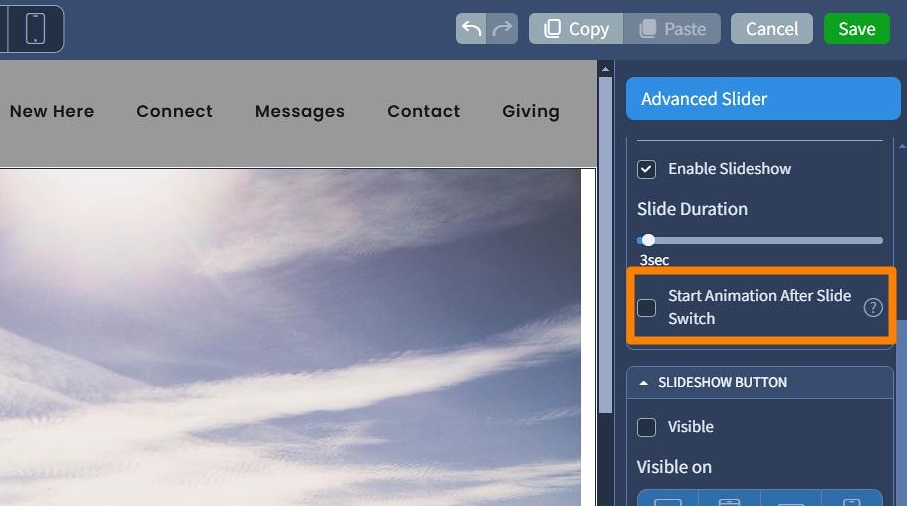
12. The "Enable Slideshow" allows you to enable or disable the slideshow.

13. "Slide Duration" determines the duration of the slide display, which can be set from 1 to 100 seconds.

14. If the "Start animation after switching slide" option is enabled, the animation will appear after the slide with its background is loaded into the gallery. Otherwise, the animation will appear at the same time as the slides are switched.
15. The Slideshow Button feature allows you to place a Play button at the bottom of a slide to start an automatic slideshow instead of manually selecting each slide.
The Arrows feature allows you to include navigation arrows on both the left and right sides of the slide to facilitate navigation.
The "Pagination" feature can be enabled/disabled to paginate your slider using the "Visible" feature (navigation icons at the middle bottom of your widget).
The "Visible" function can be switched on or off for the items described above. You can also select on which devices they will be displayed.
You can also show/hide image numbers using the "Show Numbers" feature and edit the pagination preview for different devices using the "Visible on" feature.

16. Go to the "Design" tab to change the preset.
Click the "Preset Name" drop-down to select a preset.
Click on the "Save" button when you have finished your changes.
Presets are predefined designs that allow users to quickly apply a specific style or layout to a widget. You can customize the preset style in the Design section
