
Container - Layered Backgrounds
1. The Container Widget groups multiple widgets together, helping to organize content and apply shared styles or settings to all widgets inside it. Select the Container widget.

2. Select the Design tab.

3. Click the Multi-background icon.

4. Click "Add". The maximum number of items is 10.

Color
5. Select from the dropdown what type of background it should be. Four options are available: Color, Image, Gradient, and Video.
Specify the Color and click "Save". Use the arrow icon to reset the color.

6. Click the gear icon to edit/change items, click the duplicate icon to create a copy of the item and click the bin icon if you need to delete the item.

Image
7. Click "+" to select an image from Media Library.

8. Select the required image and click "Apply".

9. Use pencil icon if you need to change the image, use the bin icon if you need to delete the image.
Specify the Image Size. Image size controls how the image fits within the container:
- Original – Displays the image at its original size.
- Cover – Scales the image to cover the container fully while maintaining the aspect ratio.
- Contain – Scales the image to fit within the container without cropping.

10. If needed, specify Image Tile. Image Tile determines how the image repeats:
- Don't Repeat – Displays the image once.
- Repeat – Tiles the image both horizontally and vertically.
- Repeat X – Tiles the image horizontally.
- Repeat Y – Tiles the image vertically.
Specify the Position of the image if it needs to have a fixed effect and specify image opacity.
The Fixed effect keeps the background image stationary while scrolling, creating a sense of depth.
Click "Save" to confirm the changes.

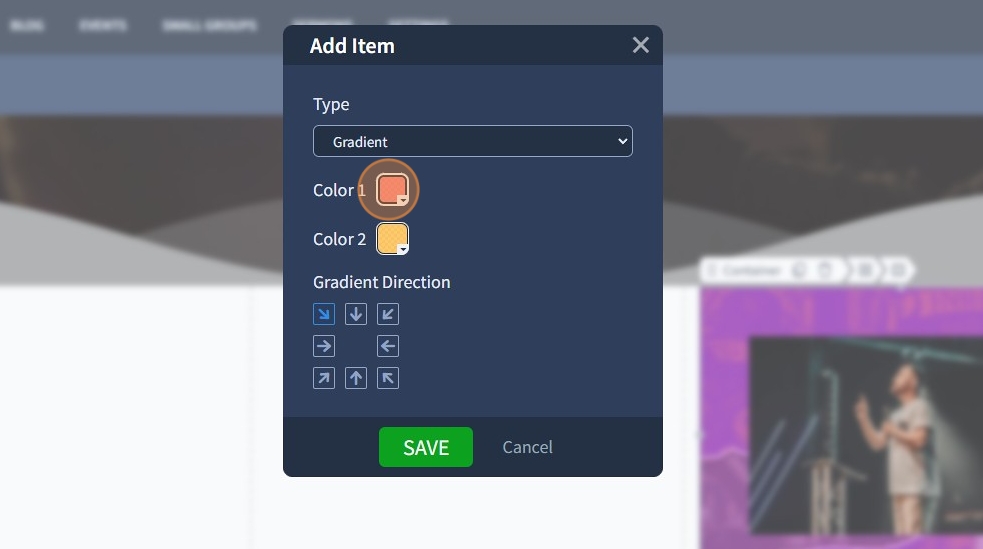
Gradient
11. Specify the first and second color for the gradient and specify the Gradient Direction and click "Save" to confirm the changes.
Video
12. Click "+" icon to add .mp4 video. To make the video background cross-browser compatible, both video formats, .mp4 and .webm, should be used.

13. Select the required video and click "Apply".

14. Specify the Position of the video and its Opacity and click "Save".

15. Drag and drop items upwards or downwards to change the order of how layers are displayed.

16. Click "Save" to confirm the changes.
