
1. The Sermon Notes widget allows you to have your congregation fill out the notes of the sermon they listened to. Once the viewer types up the notes they took on the sermon, they can email a copy of their notes to themselves. More often than not it includes a basic set of questions. Drag and drop the Sermon Notes widget on the page.

2. Select the Sermon Notes widget to edit the Settings described in Step 3 and further

3. Click "Edit" to add the Form Elements to the Sermon Notes widget. As soon as you click, the entire area except the Sermon Notes widget will be greyed out, and you can add Form Elements to the Sermon Notes

4. You can use basic widgets in the Sermon Notes. Sermon Notes supports the following basic widgets: Row, Text, Image, Divider, Space. Drag and drop the needed widgets to the Sermon Notes

5. Drag and drop the Deliver Text to the Sermon Notes widget

6. Drag and drop the Form Elements to the Sermon Notes widget. The Sermon Notes widget has the following elements: Label, Input, Text Area, Select, Checkbox, Radio Buttons

Brief Overview
7. Deliver Text is a widget that allows you to add text that will be sent in the email submission via the Sermon Notes.
The Label provides a clear description for an input field, making it easier for users to understand what information is being requested. For example, it might say, "What's the title of this sermon?"
Input is a field where users can type single-line text, for example, the answer to the question "What is the title of this sermon?".
The Text Area is a box where users can type multi-line text, such as a longer message, feedback, or a detailed description.
Select is a dropdown menu that allows users to choose one answer from the dropdown.
Checkbox is a small box that users can click to select or unselect an answer. You can place several checkboxes, and the user can select several answers.
Radio Buttons are a set of two options where users can only choose one as the answer.
Deliver Text
8. Click "Edit Content" to add text with the Text Editor for the Delivery Text widget. Combine Delivery Text with the Text Area Form Element if you want the members of the congregation to write longer messages to themselves.
Important: Use the Delivery Text widget if you need to display text in the email submissions. If you're going to use the Text widget instead of the Delivery Text widget, it will only display text on the live preview of the website, not in the email submissions.

Label
9. Specify Text and Text Style for the Label

Input
10. The Name attribute is used to receive a key and value in the email. This helps to identify which value belongs to which field in the email. For example, sermon_theme: A Sermon on Loving Others is a key and a value that would be displayed in the email for the person requesting a copy of the notes. Click the pencil icon to edit the name attribute.

11. Specify the new name attribute

12. A placeholder, similar to a Label, gives an example or hint of what kind of information the user should type in the input field. The difference with a placeholder is that it appears inside the input field as a light, temporary text that disappears when the user starts typing. Specify a new placeholder text in the corresponding field

13. While the label and placeholder focus on what and how to fill out the input field, the description provides additional guidance or explanation about the input field. Specify the description in the corresponding text field
If needed, click the device icons to adjust the alignment for each device screen

Validation
14. Both Input and Text Area form elements have the following options for validation: Required Field, Minimum Length, and Maximum Length.
Required Field - makes the Input and Text Area form elements necessary for filling the Sermon Notes;
Minimum Length - specify the least amount of characters the user can enter in the Input and Text Area form elements;
Maximum Length - specify the maximum amount of characters the user can enter in the Input and Text Area form elements;

Select
15. This is how the Select Form Element will look on the live preview. You can add the Name Attribute, add new select options, and make one of the options automatically selected in the dropdown with the checkmark icon. Use pencil and bin icons to edit and delete the options respectfully.
You can also specify that Select is a required field for the Sermon Notes in the corresponding checkbox
The Checkbox and Radio Buttons Form Elements have the same settings

General Settings
16. Click "Edit Messages" to change the error messages for the Sermon Notes

17. Please note that the [MAX_SIZE], [MAX_VALUE], and [MIN_VALUE] are the values that you have manually set for form elements where you have enabled validation. These values should not be edited as they will only be displayed on the live preview of the website
Click "Apply" to confirm the changes

18. Specify the subject of the email in the corresponding field. By default, it is presented in the following format: "New message from yourwebsite(.)com".

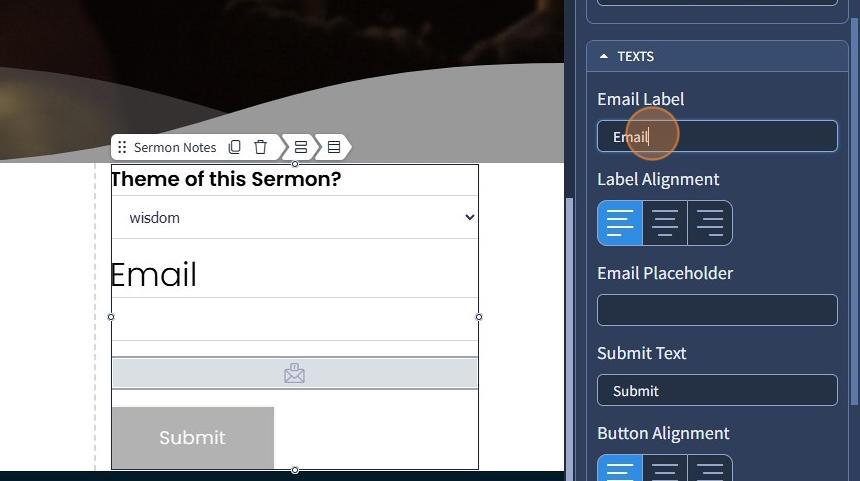
19. Specify the Label name for the Email field. Additionally, you can specify the Placeholder text, rename the Submit button, and specify the alignments for the label and button
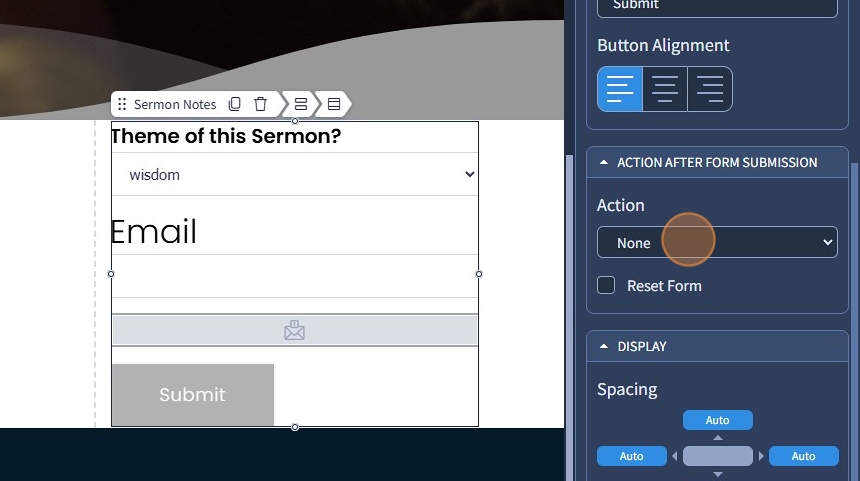
20. Select what action should be taken after the Sermon Notes submission. The following options are available: None, Go to Page, Open Popup, Open URL, Open in Lightbox, Go to Blog, Go to Blog Post
None - will lead nowhere.
Go to Page - this will lead to a specific page.
Open Popup - will open a popup window.
Open URL - will lead to an external website.
Open in Lightbox - will open the image in Lightbox effect, filling the screen and dimming out the rest of the web page.
Go to Blog - will lead to the Blog Home Page.
Go to Blog Post - will lead to a specific Blog Post.
Additionally, select the "Reset Form" checkbox if you need the Sermon Notes to reset to a clear state after the user submits data through it
The rest of the features here - Spacing, Devices, Alignment, Visible On, and Animation are common features in most widgets in the website builder. Please refer to this guide for more information on these features.
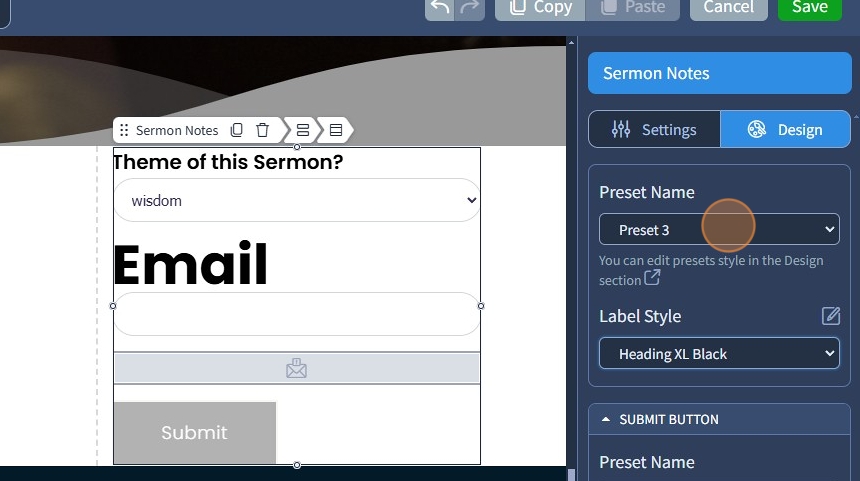
21. Switch to the Design tab

22. Select a Preset from the dropdown for the Sermon Notes. Presets are predefined designs that allow users to quickly apply a specific style or layout to a widget. You can customize the preset style in the Design section. You can also select a different Text Style for the Label in the Email field
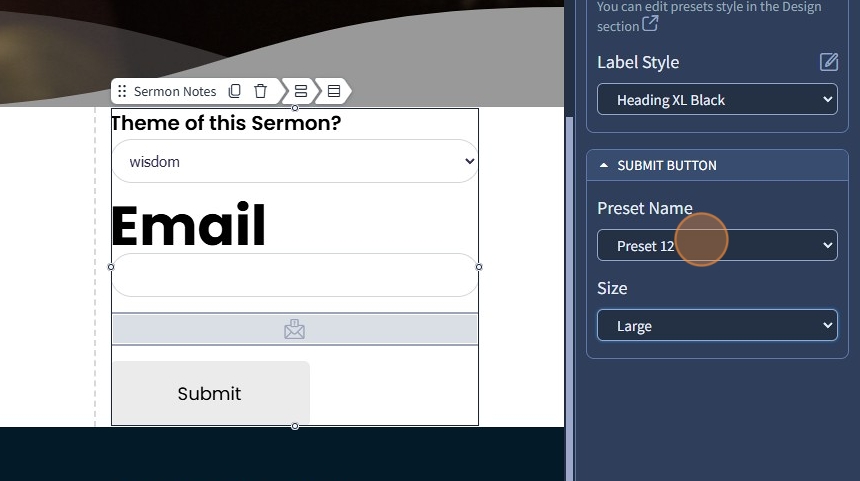
23. Specify the Preset for the Submit button and specify the button size
24. Click "Save" to confirm your changes
